OK, so there are foodies and then there are foodies. I love fancy food, fresh organic produce, expensive stinky cheeses and unpronounceable brands of chocolate. I also have plenty of soft spots in my tummy for what a friend of mine calls "bad yummies." Food you know is kinda gross, but you love it anyway.
And, I have almost no palate for wine. Unless its really, really bad - like Manischewitz bad - wine pretty much tastes to me like, wine.
So given all this, I'm not at all above concocting a cocktail from less than top shelf ingredients. Mine comes from the bottom drawer.
One of my summer mainstays is White Trash Spritzer. The recipe is simple:
White Trash Spritzer
1/3 part Lemonade Chrystal Light
1/3 part Fresca
1/3 part Two Buck Chuck Chardonnay
Light, fruity, sparking, refreshing - perfect for a hot summer night.
Tonight the Boy Wonder was invited out to dinner and a movie by a pal (Thanks Monica!) So the Mr. and I had the evening to ourselves and I decided to whoop it up and have an adult beverage. I didn't have ingredients for a WTS, but I was able to make:
Sangria Basura Blanca
1/3 part Mixed Berry Chrystal Light
1/3 part Diet Sierra Mist
1/3 part Forrestville Cab
Very tasty on a chilly evening.
Bottom's Up!
Friday, July 31, 2009
Saturday, July 25, 2009
I need a biscuit, baby!

Did you and your friends make up silly songs/rhymes/phrases when you were a kid? Me and mine did. And one that has stuck in my head since I was in 4th or 5th grade is:
I need a biscuit, baby
I need a biscuit, baby
If you don't give me a biscuit
I won't eat the dinner you made me!
I have no idea how or why we came up with that one - and it's not like I grew up in the south were biscuits abound, I was in the Beverly/Fairfax neighborhood of LA where bagels (or even tortillas) are much more common.
But this morning I did indeed need a biscuit, so I made some from the handy bag of Eye-Opener Mix I keep in the freezer:
3-in-1 Eye-Opener Mix (aka Your Own Personal Bisquick )
8 cups all-purpose flour
1/3 cup baking powder
1 tablespoon kosher salt
3 tablespoons sugar
8 ounces (2 sticks) unsalted butter
Mix the flour, baking powder, salt, and sugar in a large bowl with a wire whisk.
Cut the butter into small chunks and add them to the dry mixture.
Toss the butter around to coat, and then use a pastry cutter or slash two knives across each other to cut the butter chunks into smaller pieces. Keep cutting until the mixture is sandy in consistency. You can also use a stand mixer with the paddle attachment for this step.
Store the mix in the freezer for up to 6 months.
Makes about 9 cups of mix.
For Biscuits:
2 cups Eye-Opener Mix
1 cup milk, sourmilk*, or buttermilk
Preheat oven to 400°F.
Grease a muffin tin with vegetable oil spray.
In a large bowl, mix the milk and Eye-Opener Mix with a wooden spoon until
combined.
Then beat the dough briskly with the wooden spoon for 30 seconds.
Using 2 spoons, drop ¼ cup dough into each muffin cup.
Bake for 12 minutes.
Remove biscuits from the oven and serve warm, slathered with butter.
You can also cut them in half and toast them if you want them extra crunchy.
*To sour milk, put 1 tablespoon of white vinegar in a measuring cup, then fill with milk to equal 1 cup.
For CiniMinis:
Add 1 teaspoon of ground cinnamon to the dry mix.
Fill mini muffin pans about 1/2 full.
Brush the tops with melted butter, then sprinkle with cinnamon sugar.
Makes 24.
Thursday, July 23, 2009
Rice, Rice Baby
Sometimes it's fun to play with your food. I played with rice & food coloring and made some cute craft projects.
Put one teaspoon of water and 10 drops of food coloring in a baggie - I used these nifty neon colors

Add 1/2 cup of rice to the bag and mush it around until the rice is completely colored

Spread the rice onto a wax paper-lined baking sheet and let it dry completely, it'll take about an hour or so (or much less if you put it outside on a hot, hot day like I did)

Brush a picture frame, box, foam ball - whatever you've got - with some white glue. Cover the glue with the rice (sprinkle it on or dip the surface in)

Et Voila! You've got some cute projects and a fun activity for pennies

Sunday, July 19, 2009
Basil, Sweet!

The fabulous $2.99 Sweet Basil plants at Trader Joes are the perfect excuse to make pesto, and a 8+ hour shift at KGO is the perfect excuse to make White Bean & Basil Spread with No-Kneed "Awesome" Bread.
My frugal pal Vanessa gave me the tip to use cashews instead of pine nuts in pesto. You still get that sweet, mellow, nutty richness, but at half the price. I also replaced Parmesan with less-expensive Asiago with no complaints from the co-workers who gobbled it up.
White Bean & Basil Spread
1/4 cup toasted, unsalted cashews
2 large cloves garlic, peeled
1/2 cup fresh arugula leaves, packed
1/4 cup Asiago cheese, grated
1/2 cup olive oil
2 cans (14 oz) white kidney (cannellini) beans, drained & rinsed*
water or chicken broth as needed
Place the first 5 ingredients in the bowl of a food processor and whirl to combine. Add the beans and puree until smooth, adding water or broth to thin as needed.
Makes about 3.5 cups
*I usually use dry beans when I make white bean spreads, but I was short on time and the cans were only $.89 each at TJs - well within my limits of frugality
Thursday, July 16, 2009
Little Green Onions

Did you know you could re-grow green onions? You can! I feel a little like Dr. Frankenstein - I have the power to re-give life!
Just cut cut the onions a couple of inches from the bulb, stick them in an inch or so of water and set them in a sunny spot. Soon you'll see green shoots sprouting up - cool!
Keep doing it as long as you can, adding more water as needed. You should get 3-4 re-growths from your onions.
Friday, July 10, 2009
It's A Book (well almost...)

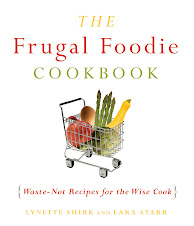
I received an ARC (Advanced Reading Copy) of The Frugal Foodie Cookbook this week and boy does it look great! The cover and interior layout designers did such an amazing job - yay!
Kale Krisps!

My friend Danielle and her family were going out of town for a couple of weeks and in the midst of all of the backing and scheduling, she realized that she had a fridge full of fresh fruits and veggies. She hated to toss them, and could only eat so much - so she put out a call to her friends to come on over and grab a bag of organic farm produce as well as garden-variety grocery store goods.
My grab bag included a beautiful bunch of Tuscan a.k.a.Dino Kale. I knew that Mr. Meat & Potatoes and Young Master Picky would be less than inclined to eat it no matter what I did to it. but that the Gourmet Gals of the book club would love a to nibble on a basket of Kale Krisps.
These earthy little snacks have are great with cocktails, and have pleasantly bitter aftertaste. Don't be alarmed when they crackle loudly in the oven, or fill the house with a smell similar to cooked Brussels sprouts.
Kale Krisps
1 head Tuscan or dino kale, washed and cut into tortilla-chip-sized pieces (the stems are a little chewy, but tasty - go ahead and use 'em)
½ tablespoon balsamic vinegar
2 tablespoons olive oil
salt and pepper
Preheat oven to 300°F.
Place the kale pieces in a bowl and drizzle with vinegar and olive oil.
Turn the leaves a couple of times to coat. Sprinkle with salt and pepper.
Arrange leaves in single layer on 2 large baking sheets.
Bake until crisp, about 30–35 minutes, tossing halfway through cooking time and turning down the heat down if they get too brown before they get crisp.
Transfer to a rack to cool.
Makes about 6 cups.
Thursday, July 9, 2009
I don't want to alarm anyone....
... but there are TOMATOES on my plant!!

Photo (c)Max Starr - he did a good job, no?

Photo (c)Max Starr - he did a good job, no?
Friday, July 3, 2009
Tray Chic
I just love saying "I have a meeting with my PUBLISHER" with an affected Jacqueline Suzanneque flourish. This week I had one at the Viva Editions office with the lovely and talented Brenda Knight and her new intern, Corinna.
And, because the Frugal Foodie wants to maintain her rep, I always try to bring a little snickety snack with me to a meeting. For this meeting, I brought Rosemary Flatbread and White Bean Spread with Chopped Green Olives - simple, cheap, easy and yummy!

I knew we'd nibble while we met, but that there would likely be leftovers I wanted to leave behind at the office for the folks to snack on the rest of the afternoon. So I needed to devise a frugal, attractive, disposable way to transport and serve the treats.
The solution...

I sliced off the bottom 2" or so of a small shipping box, then lined the box with some of the packing paper that it came with. One recipe of Flatbread fit perfectly, and I used a recycled hummus container to hold the White Bean Spread.
Looks good enough to eat, no?
White Bean Spread
2 tablespoons olive oil
1/2 large white onion, chopped
3 cloves garlic, peeled and sliced
1/2 pound dry white beans, cannellini or Great Northern
1 tablespoon fresh or 1-1/2 teaspoons dried oregano + additional for garnish
4 cups vegetable broth
1/2 pound good-quality green olives, pitted and chopped
Salt to taste
Heat the olive oil over medium heat in a large stockpot. Add the onion and garlic and sauté until translucent. Add the beans, broth, and oregano and turn up the heat to medium-high. Bring to a boil, then reduce the heat to medium. Cover the pot and simmer until the beans are tender, about 2-3 hours. Check the pot every so often, adding more broth or water if needed the so the beans are always covered.
Drain the beans in a colander, reserving the liquid. Puree the beans in a food processor, adding reserved liquid if need to create a spreadable consistency.
Thursday, July 2, 2009
Say Cheese!
For better or worse, the state of the economy is such that there are amazingly talented people who have time on their hands, so my pals photog Steve Aja and Susan Eslick came over to do a one-day photo shoot of recipes from The Frugal Foodie Cookbook
I cooked 15 recipes in 2 HOT days, and was amazed at how good Susan and Steve made everything look. And, I learned a few food styling tricks as well, such as 7-up + coffee + salt makes perfect "champagne"

Where you or I may see a funky, faded swing, Steve saw a perfect place to pose a serving of Tout Le Fruit Crisp and a cup of coffee

The lovely and talented Ms. Susan Eslick
The results from the shoot will be posted soon - and they are beautiful!
Subscribe to:
Posts (Atom)